Raynor Pilot II Garage Door Opener Manual: Models 83650RGD-267 and 8365WRGD-267
Raynor Pilot II Chain Drive WiFi Garage Door Opener
Welcome to our comprehensive guide on the Raynor Pilot II 83650RGD and 8365WRGD Residential Garage Door Opener. In this article, we will cover everything you need to know about the Pilot II and these specific models, from its features and benefits to programming instructions and FAQs. Whether you are a homeowner looking to install a new garage door opener or someone seeking information on how to maintain or troubleshoot your existing unit, this guide is for you.

Raynor Pilot II Opener Features
The Raynor Pilot II with WiFi 83650RGD and 8365WRGD 1/2 hp chain drive garage door openers with integrated wifi boasts a range of features designed to enhance user experience and security. Some of the key features include:
- Motor: 1/2 horsepower, 1,625 RPM, automatic thermal protection
- Lighting: Max (2) 100 watt light bulbs
- MyQ Technology: This feature allows you to securely monitor and control your garage door opener with your smartphone, tablet, or computer. Alerts can be received as email or pop-up (push) notifications on your mobile device so that you always know the status of your garage door.
- Security+ 2.0: This safeguards your household, with every click a new code is sent to the garage door opener so that the door opens only for you.
- Energy-Efficient: The opener is designed to consume less power, making it an eco-friendly option.
- Smooth Start and Stop: This ensures that the garage door operates smoothly, reducing wear and tear on the door and opener.
- Integrated Bluetooth Technology: Reduces setup time and makes it even easier to connect to the myQ app, other myQ devices and smart home technology solutions.
- Built-in Wi-Fi: This allows for easy connection to your home network, enabling smart features and remote access.
- Multi Function Control Panel: Use the control panel to operate the garage door, control the opener lights or use the lock function to lock out the remote controls.

How to Program Remotes
Programming the remotes for your Raynor Pilot II garage door opener is a straightforward process. Here’s a step-by-step guide:
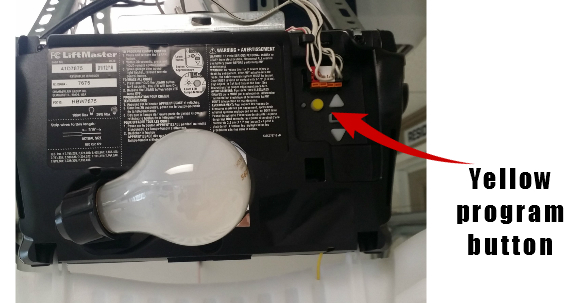
- Locate the “Learn” button on the garage door opener unit by pulling down the light cover on the opener.
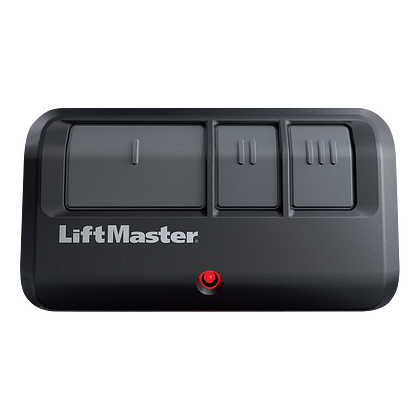
- Locate the PROGRAM button on the remote control. On the 893MAX Remote you will find the button on the back of the remote (in the middle).
- To enter programming mode, use the visor clip to press the PROGRAM button on the back of the remote until the LED on the front of the remote comes on.
- Press and release the “Learn” button on the garage door opener. The “Learn” button LED light will come on.
- Within 30 seconds, press and release the button on the remote control that you wish to program. Watch for the light bulb on the garage door opener to blink. Once it blinks do not press the remote button again as it has now been programmed.
- Exit the programming mode by pressing one of the other two remote buttons that you didn’t program.
- Test the remote by pressing the remote button that was just programmed.
- Repeat the above steps for each 893MAX or 890MAX remote that you wish to program to the operator.
Programming Car Homelink to Garage Door Opener

Homelink compatible version 4.0 or higher. It may require a Liftmaster 855LM Homelink Compatibility Bridge depending on the model and year of the vehicle.
Below are some general programming instructions that may work with your vehicle. Different makes of vehicles can have slightly different instructions. If the instructions below don’t work then we suggest that you go to the Homelink website for more specific instructions. You can enter your make and model of vehicle along with the make and model of garage door opener for directions specifically for your vehicle.
- For first time training, press and hold the two outer HomeLink® buttons, releasing only when the HomeLink indicator light begins to flash after 20 seconds. (Do not perform this step when training the additional HomeLink buttons.)
- Position the hand-held transmitter 1-3 inches away from the HomeLink surface (usually located on your visor, overhead console, or mirror), keeping the HomeLink indicator light in view.
- Using both hands, simultaneously press and hold both the desired HomeLink button and hand held transmitter button. DO NOT release until the HomeLink indicator light flashes slowly and then rapidly. When the indicator light flashes rapidly, both buttons may be released. (The rapid flashing indicates successful training.)
- Press and hold the trained HomeLink button and observe the indicator light.
- If the indicator light is solid/continuous, training is complete and your device should activate when the HomeLink button is pressed and released.
- If the indicator light blinks rapidly for 2 seconds and then turns a solid/continuous light, proceed with the following training instructions for a rolling code device. A second person may make the following steps quicker and easier. Please use a ladder or other device. Do not stand on your vehicle to perform the next steps.
- At the receiver (motor head unit), locate the “learn” or “smart” button (usually near where the hanging antenna wire is attached to the unit). If there is difficulty locating the training button, reference the device owner’s manual.
- Press and release the “learn” or “smart” button (the name and color of the button may vary by manufacturer). NOTE: Once the button is pressed, there are 30 seconds in which to initiate the next step.
- Return to the vehicle and firmly press and hold the trained HomeLink button for two seconds and release. Repeat the “press/hold/release” sequence up to 3 times to complete the training process.
Raynor Pilot II Garage Door Opener Manuals
For a detailed instructions on installation, maintenance, and troubleshooting, refer to the garage door opener manual.
Raynor Pilot II 83650RGD-267 Garage Door Opener Manual
Raynor Pilot II 8365WRGD-267 Garage Door Opener Manual
Compatible Remotes & Replacement Parts
893MAX Remote, 890MAX Remote, 878MAX Wireless Keypad, 882LMW Wall Control Panel, 374UT Mini 2-Button Remote, and 041-0136 Safety Sensors
PREVIEW | PRODUCT | DESCRIPTION | VIEW |
 | 893MAX Liftmaster Remote |
| |
 | 890MAX Liftmaster Remote |
| |
 | 878MAX Liftmaster Keyless Entry |
| |
PREVIEW | PRODUCT | Description | VIEW |
 | 41C4220A Gear Assembly |
| |
 | 374UT Liftmaster Universal Remote |
| |
 | 041-0136 Liftmaster Safety Sensors |
|
FAQ’s
Q: Can I control the Raynor Pilot 8365RGD with my smartphone?
A: Yes, thanks to the built-in Wi-Fi and MyQ Technology, you can control and monitor your garage door opener from anywhere using your smartphone.
Q: Do I need to service the Raynor Pilot garage door opener?
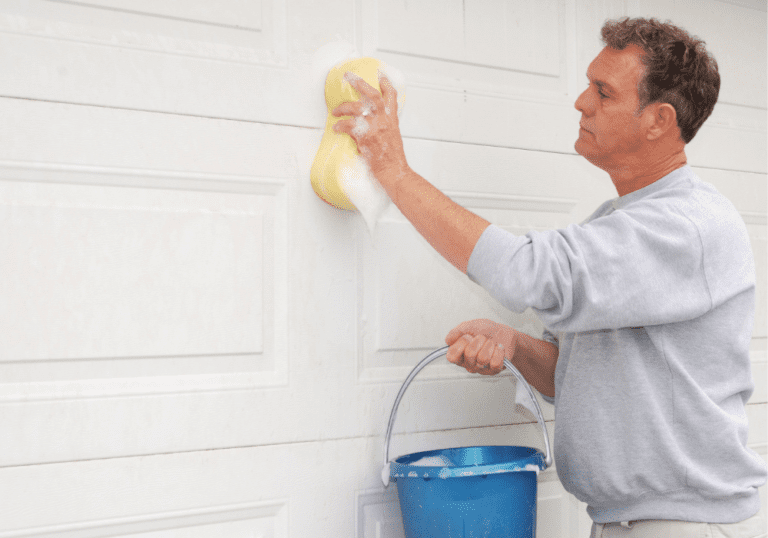
A: Using a quality synthetic lubricant on the chain every 6-12 months is ideal. Maintaining and servicing the garage door will also help in extending the life of the operator. Read our Ultimate Garage Door Maintenance Checklist Guide for more helpful tips and suggestions.
Q: Can I install the Raynor Pilot 8365RGD myself?
A: Yes you can but if you’d rather have it done professionally we suggest that you contact your local Raynor garage door dealer. Not sure who your local Raynor dealer is? Go the Raynor website and look up the dealers closest to you using your zip code.
Q: What do I do if my garage door opener is not working?
A: Refer to the troubleshooting section in the product manual. In the back of the opener manual you’ll find a Troubleshooting section. There you will find a Diagnostic Chart. The Up and Down arrows found on the garage door operator will flash when the operator is experiencing issues. Refer the the Diagnostic Chart to determine what the flashes mean and suggestions on how to solve the issue. If the issue persists, contact your local Raynor dealer for assistance.